Showing posts with label gardening. Show all posts

Friday, April 16, 2010

Seeds...Better late than never?

I usually start my seeds in March but I've been disappointed by "leggy" and poor producing plants. Part of me blames the seeds. In the past I've bought any variety I could find at a local store but this year I received a seed catalog from Harris Seeds. I studied that catalog like a college kid cramming for finals. I liked the fact that they are located in Rochester, NY. I figured that if a variety did well in their test area...my garden shouldn't be too different.

I also heard that you shouldn't start your seeds until 4 weeks before planting to avoid legginess. Or so Martha Stewart's gardening expert said. Knowing that I won't be planting fragile plants until Memorial Day I've decided that I'll be starting my seeds indoors in mid to late April.

BUT IT'S TORTURE I TELL YOU!
Knowing I bought really great varieties this year. From an actual seed company! I just wanna get dirty!!! LOL. I bought:
  • Harris Lettuce Blend (a blend of Cimmaron, Red Salad Bowl, Tango, Slobolt, Green Salad Bowl and Royal Oakleaf)
  • Bush Blue Lake Beans
  • Colored Sweet Pepper Seed Blend (Lady Bell ~green to red, Early Sensation ~green to yellow, Valencia ~green to orange, Purple Beauty ~green to purple, and Flamingo ~light yellow to blush red to red. The kids will love all those colors!)
  • Regal Cucumber
  • Nantindo Carrots (pelleted~last year I had a horrible time with overcrowding)
  • Revelation Corn (early variety) & Renaissance Corn (late variety)
  • Waltham Butternut (why mess with a classic?)
  • Zuchini Elite
  • Howden Pumpkins
  • Charlotte Radishes (Can't wait to make more radish relish! Mmmm...)

As you can see there is no tomaotes. I understand almost every good gardener loves growing tomato. But hubby and I are not tomato fans. We've discussed growing them to make our own salsa, and spaghetti sauce but... not this year.

Until I can get my seeds started I've got plenty to do. Garden Clean-Up and Additions. Oooh what fun.

Monday, May 26, 2008

Still Gardening without my SuperPowers!

You may have thought that I abandoned this blog but that is not the case. I have however, abandoned the idea that I am Superwoman and by doing so have given myself permission to focus on the big stuff right now and let all the small stuff wait. Unfortunately, compared to my Daughter's J.M.E. everything is small stuff.

That doesn't mean I've given up on gardening. No, I'm far too addicted for that! In fact, I've even expanded my gardens! Yes, it has taken me this long but I finally have my Vegetable gardens planted. Yeah, me!

But sadly, the grand plans and schematics that I had hoped for were scraped due to well...lack of time between Dr. appointments! After hours of back breaking work by my strongman hubby a plain lawn was transformed into 4 equal plots for veggies. Equal in size not in soil quality. The soil from one plot to another varied immensly from perfect topsoil to pure clay.

In the background you might recognize a rotatiller under that tarp. You may be thinking that my husband isn't the strong man I've discribed but I assure you he is! That Machine is the most contrary piece of gardening equipment to ever be invented! It ran well for about 2 minutes and then it would over heat. My hubby called it the "one row workhorse". You'd complete one row and then it would rest for 15 minutes before it would start again. So all in all, hubby did about 6 passes with the Machine and instead broke all that sod up with an old fashioned Maddox. What a Man! What a mighty fine man! All in all, it took him about 3 days of work. (Of course, with our schedules he did it over a two week time period.)

Then it was time to plant. At last!!! I was so proud to put in the peppers I had started from seed myself. They looked as good as the ones from the Backyard Farmer. While there I also purchased my onion sets. And as soon as I planted these prized possessions of mine I began to worry about a little creature I had seen in making his escape from my flower gardens just a few days before. Was I doing little more than setting up a free buffet for this cute vandal?
We've discussed fencing but we haven't gotten there yet...

After planting we carefully laid out our new watering system. We attached a 100 foot regular garden hose to our water spicket. At the other end we attached a four way splitter to which we attached four Seeper flat soaker hoses (by Gilmour Gardening Innovation from Wal-Mart for approx $13 per 75 foot hose). With one easy step I can now water all four gardens without wasting water, energy, or time (which is highly prized at this point). My new gardens are now ready. But will they grow?


Tuesday, April 1, 2008

Tiny Bird Brain Gardening (Part 2)

Everyone knows that hummingbirds love red flowers but do you know why? Because although tiny, a hummingbird's brain is quite knowledgeable about where to find the most nectar. Red flowers tend to have more nectar than other colors. Does that mean a hummingbird garden should be completely red? No, hummingbirds also feed at pink, orange, purple, yellow, and even white flowers. The real attraction for hummingbirds is shape. Think "Tubular" and you'll be thinking like a hummingbird.

So what does a garden need to be successful at attracting hummingbirds?
  1. Flowers: You can choose combinations of annuals, perennials, flowering shrubs, vines and even some flowering vegetables to attract hummingbirds. Remember that they prefer "hot" colors and to overlap the bloom times so the garden never runs out of nectar. Although, not every flower has to be red, a patch of red flowers will act as a "Come and Get Me" sign. Also, regional wildflowers provide more nectar per bloom than other flower varieties so if at all possible "Go Wild!"

  2. Sun & Shade: Hummingbirds prefer to spend about half their time in the sun, 1/4 of their time in partial shade, and the remainder of their time in full shade.

  3. Shrubs & Trees: Essential in providing both partial and full shade they also provide locations for perching, shelter, and roosting.

  4. Flight room. While most birds perch to feed, hummingbirds don't always have that luxury. They need room between flowers to fly and hover. A tiered flower bed works best for hummingbirds.

  5. Water. Hummingbirds love to bathe (actually to shower). And are very resourceful at finding water for bathing in. They prefer moving water such as beads of water left on leaves after a rainfall or the fine spray of a waterfall. To set up a hummingbird shower in your hummingbird garden use a nozzle that gives us a continuous fine mist.

Favorites for Hummingbirds

  • bearded iris
  • bee balm
  • bellflower
  • buttercup
  • butterfly weed
  • carnation
  • catmint
  • columbine
  • coralbells
  • daylily
  • evening primrose
  • fireweed
  • foxglove
  • impatiens
  • hummingbird's trumpet
  • hollyhock
  • larkspur
  • loosestrife
  • poppy
  • sweet william

Friday, March 28, 2008

Polka-Dots and Mud!

I know I promised hummingbird info in my next post but...
I ACTUALLY DID SOME GARDENING TODAY!!! Apple~I'm sorry for the pain that this is going to cause. Look away now. LOL.

My hubby surprised me with a trip to my favorite store: The Backyard Farmer. Brian was able to offer me some great advice for my veggie garden and I had a wonderful time at the store. And I bought a new pair of rubber boots. Believe it or not, I never actually had a pair before! I always just wore my winter boots when working in a muddy garden. But not anymore! Now I have state of the art, old fashioned Wellies!
After we returned home, I slipped into my new polka dotted wellies and my other spring gardening gear~thermal sweatshirt, fleece hat, and cheap gardening gloves. After all, there is no sense ruining my favorite garden gear in the mud! As I worked in the garden several of my neighbors drove and gave the courtesy honk & wave. One even rolled down the window and hollared, "She's in the garden! It must be spring! WooHOO!" And it made me realize that my neighbors know me as the garden lady or the dog walking lady. Neither is an occassion I dress nicely for. They may never have seen the real me (you know~clean!). Just to be sure I don't make that same mistake here below I've posted both versions of myself. Clean and well... MUDDY!


Don't believe that I'm all that muddy? Just look at my gloves at the end of the day!

Don't you love gardening in the spring?

Thursday, March 27, 2008

Bird Brain Gardening!

As gardeners we love to see company enjoying our garden as much as we do. From those neighbors who peer into our gardens with envy, to the mail man who pauses to enjoy the blooms near the mailbox. But how often do we get the satisfaction of seeing people enjoying our garden? Not nearly enough. That's why many of us become obsessed with the other visitors to our gardens: The BIRDS! Most gardeners end up enjoying the birds almost as much as they end up enjoying they're gardens. And I'm no different! Just this week I plowed over small children as I ran from room to room trying to capture a picture of a Cardinal! Our first ever! With that in mind I thought it was high time to address birds in the garden because any garden can be a sanctuary for birds. All your yard needs to do is supply is some very basic bird needs: adequate cover, food, and protection from enemies. And chances are you have most of these basic needs already covered. For the biggest variety of birds try dedicating 10% of your plantings to insure the safety and well being of your bird population.

Bird Brain Gardening

  1. Trees! Evergreens provide bird shelter year round and this is extremely valuable to your winter birdies (songbirds enjoy red cedars & other pines while Balsam firs attract chickadees, nuthatches, and finches~among others). Shade trees~even a young tree~is loved by most birds (oaks can attract mourning doves, jays, and flickers and maples are a favorite for evening birds like grosbeaks and purple finches).


  2. Shrubs! The single best way to invite birds into you yard is to have shrubby hedges. In addition to providing shelter they can be an excellent source of food for your winged friends. Honeysuckle, currants, gooseberries, and wild blueberries (if you're willing to share) are fantastic for the birds.


  3. Flowers and Herbs! If we love them then chances are our feathered friends will too. But just in case you really aren't sure here's a list of birdie favorites!
  • Asters
  • Cosmos
  • Forget Me Not
  • Foxglove
  • Lavender
  • Lobelia
  • Marjoram
  • Petunia
  • Poppy
  • Sunflower
  • Thyme

Did I cover everything? Ooops! Looks like I forgot our hummingbird friends. Look for ways to invite them into your garden in my next post.

Tuesday, March 25, 2008

Innovation or Idiocy? Don't let your Relatives decide!

My husband and I are just a small part of a longstanding gardening tradition in our families. And to my husband vegetable gardens are a source of more than just vegetables. It's a connection to the past. At least that's my husbands idea. He lives by a very simple motto: Change is BAD!

So my wild idea of growing our vegetables in raised beds met with...Well...raised eyebrows.

My wild idea of not planting in straight rows met with Wild Skepticism.

My wild notion of using flowers mixed in with the vegetables to repel pests met with Wild Laughter.

And he wasn't alone. I've heard comments from all the "traditionalists". My Mom, My Dad, Aunts, Uncles. My mother thinks I'm a nut for planning on planting pole green beans. "Bush beans grow just fine and they don't need any support! Why go through the extra work?" Aesthetics? She just shakes her head. One relative even told me that I COULDN'T plant a garden without the help of a rototiller. I explained I didn't need one because I was using raised beds they answered, (like I was mentally impaired!) "Yes, dear, that's for your flowers. For a vegetable garden you need a rototiller." Eventually, I gave up and said, "I'll send you photos when I'm done."

There are many reasons why people don't like change. Many reasons why others are always looking for innovation. But I...I like the middle road. I am not trying something that is untested. I am not leading the way in gardening revolution. Neither am I bogged down in the "way it has always been". I am looking for my own gardening way.

I think that is how most gardener's do it these days. We read, we talk, we research, and we do it the way that we feel is the best way for our gardens.

Monday, March 24, 2008

Peter Piper Picked a Peck of Peppers...

After some dedicated gardener spent hours toiling away in the dirt planting the seeds, praying for sunshine, and protecting them from varmits! Yet, does the gardener get any recognition for the vital role that they played? No the only thing remembered is:

Peter Piper Picked
a Peck of Peppers,
Peter Piper Picked
a Peck of Peppers,
Peter Piper Picked
a Peck of Peppers!

Well, Peter just better stay away from my garden because if I see his grubby little hands on my precious peppers I might just get violent! I have just planted Burpee's Signature Big Dipper variety of sweet peppers. I find myself very being very protective over my little pepper plants (and they haven't even sprouted yet!). I have to ask myself why I am so emotionally connected to these tiny little pepper seeds. Maybe it's because of those childhood memories that flood back when I see the seed packets.

In my childhood home a Pepper seed packet meant only one thing to me...Pepper Relish! Mom's homemade pepper relish would make any plain-jane meal into a tasty treat! I realize now that my children have had this extrordinary treat only occassionally!!! I have done my children a grave disservice and this is the year that I WILL rectify the situation!

I vow this is the year when I fill my cupboards with the tasty treat and that we have stuffed peppers on a regular basis! This is the year when we mix fresh peppers in our meatloaf! This is the YEAR!
So if I am seen softly crooning love songs to a flat of soil with no obvious signs of life do not think me a mad woman! For I am the dedicated gardener upon which Peter Piper depends!

Monday, March 17, 2008

The Snow Recedes and the Cold Continues

The snow has begun to melt in spots around my cabin today but the cold has set it and it's bitter. I can see a bit of my garden and a lot of the clean up that I have to do. But I'm having a hard time concentrating on the garden right now.

We've received the results of Garden Girl's EEG. The EEG measures seizure activity in the brain. Unfortunately, her results were highly abnormal with 13 instances of seizure activity in 60 minutes. This is the same girl that we thought was perfectly healthy a month ago! I've started a new blog as a place for her and I to keep track of our thoughts as we begin this long journey: Seize the Day...A Child's Way.

In the mean time, I intend to celebrate any signs of spring. Such as melting snow and the return of the Robins! Yeah, they've finally come home~at least that's what hubby says. I haven't seen them yet. And the deer are back in the fields. There is even some sunshine today. It won't be long until spring really begins and I can't wait!

Saturday, March 15, 2008

Water features for the Cheap! Like ME!

You can't walk through any garden nursery, home improvement store, or major retail store without seeing water feature paraphernalia. "It looks so easy" you might think. Then you start imagining your garden with the soft tinkling of water as a background. Thats when you say, "Honey, what do you think of..." Then reality sets in (usually in honey's voice). "First we need to dig, then place good construction sand in the hole, then we'd need one of those black pre-formed things...look at how much they cost! Then we need a fountain, which means we'll have to run electrical out there. This is gonna cost a small fortune! Maybe, next year." And you sigh and nod your head.

But water features don't need to be a huge backyard production or a huge drain on the budget! Featured in this month's issue of The Family Handyman is a 1 day pond & fountain that is simple and inviting. This article helped me to think a bit more creatively about water features. I guess in my mind I thought that you needed to get the biggest water feature available to really have a "beautiful" pond to rest by. While that would be nice if I ever win the lotto I really don't want to wait that long and so I've begun my search for all things water and budget friendly.

I am a true DIY'er. I love to find images in magazines, online, even from TV and then figure out how to make it myself for way less money. That's Why I've compiled a list of Cheap & Easy Water Feature Tricks:

  1. If it's waterproof it's a water feature in waiting! Cheap plastic pots, galvanized tubs, even buckets. Go wild but stay cheap! Use rocks, plant material or even mounds of dirt to "hide" the ugly part.
  2. If you don't want to dig a hole for anything...That's even better. Above ground water features offer even more flexibility. If you change your mind about placement it's easy to drain the water and move your feature to a brand new home. This can provide a whole new atmosphere in your garden...instantly.
  3. Solar Powered pumps. If you're electrically challenged or you're really craving a water feature at the far end of the garden solar powered fountains can be very useful. However, these must be in the sun to work. And prices vary but if you're saving money by using cheap plastic pots then you'll have a little extra to spend on pumps.
  4. Get Whimsical! Nothing adds interest to a garden more than the unexpected. NO, I am not insisting that you get a pink flamingo with water shooting from it's nostrils! Instead re-purpose other garden items such as the birdhouse seen below.
  5. Don't be afraid to wing it! Buy a pump and some tubing. Go home. Look at your favorite garden spots. Have a birdbath that needs some pizazz? Or a trellis that would look wondeful with some water cascading down one side? With a few simple changes anything can become a wonderful water feature.

Thursday, March 13, 2008

10 Cheap Tricks to Great Gardens

Let's start by saying that if you have the money to spend on your garden than by all means spend it! But most of us have to be budget conscious when we plan or prep our gardens. And having an inexpensive garden doesn't have to look cheap. And spending a lot of money doesn't always guarentee a beautiful garden. I like to think that what my garden lacks in cash I make up for in blood, sweat, and tears AND CREATIVITY! Here are some of my tips for a cheap and fantastic garden:

  1. Invest in longer living plants. Perrenials will give you a longer bang for your buck but they may not provide the instant WOW you're looking for. But still with a little patience perrenials will provide years of blooms.

  2. Choose disease resistant varieties. While there is always controversy over heirlooms versus disease resistant I always choose the latter. My reason is simply I hate to spray chemicals on any plants. Chemicals cost money so I'd rather spend the money on a disease resistant plant and avoid the extra work and worry of spraying.

  3. Join a Garden club. You know I can go on FOREVER about the benefits of a garden club but seed and plant swaps are invaluable! Also you know who to call when you have questions regarding your newly swapped plant.

  4. Visit your nursery on shipment day. This is a no-brainer but it took me years to figure out~LOL. Grab the healthiest plants before anyone else has a chance.

  5. Maximize your harvest by planting in Raised or Framed Beds. These provide better drainage and better soil opprotunities.

  6. Group your plants by how much water they need. While this just makes good basic garden sense it is often overlooked when it comes to saving money. Just think how much you could save on the water bill if your not running out to douse the whole garden everyday when it actuality only a few of the plants need that drink.

  7. Spend time in the Garden. If you don't have money to spend then spend time. After all, the more time you spend the quicker you'll notice pests, disease and other problems. And the quicker you spot a problem the more likely you can "nip it in the bud" so to speak.

  8. Be helpful. I've found many benefits to my garden by helping someone else in theirs! Anytime a gardener says, "I'm not feeling well" or "I have to scale back." Offer your services. If you can help the gardener my maintaining their garden while they recover from surgery or illness they'll be grateful. And more likely to share, cuttings, seedlings, etc. If you can't convince the gardener to continue with their large gardens offer to help them with the "heavy" work as they scale back. Then ask if you could adopt some of the plants they no longer have time for. Obviously, I like to be helpful even if I don't get anything in return but gardeners have big hearts so that rarely happens.

  9. Someone else's compost may be your really great garden. Don't be afraid to find plant material in odd places. I got most of my garden material for my backyard bed from a compost pile of a gardening friend. I have another friend who has 5 gallon buckets and garden shovels in the back of her vehicle at all times in case she spots a roadside "must-have".

  10. Don't be afraid to ask. A great compliment will you get you just about anything. Another friend was working in her front yard when a local exerciser called to her. "I really love that plant of yours. It's magnificent...What is it?" They delved into coversation. The next day my friend waited for this exerciser to make her way past the house again. When the runner came along she hurried out and gifted her with a small piece of the plant. They've been good friends ever since.

These are simple money savers that can really change the way you garden and the way your garden looks. Be choosy, Be helpful, Be thrifty, Be kind...and your garden will reap the rewards.

Tuesday, March 11, 2008

Salamanders eat Slugs?

I was lucky enough to talk with my good friend Apple yesterday on the phone. We mulled over the "Never-ending winter" and the feet of snow surrounding her home. I briefly mentioned how I live on a wind-whipped hill top and how my snow will probably be the first in the area to go away. However, it seemed just mean to talk about my "greener" condition for very long.
Instead the conversation turned to garden pests. In my opinion, snakes are the worst garden pest that there is. After all, there is only one garden pest that can make me leave the garden running and screaming, and quite frankly making a spectacle of myself. However, Apple loves her garden snake because since he's made himself at home under her hosta she has had no more slug damage. (BTW, I will never go near her Hosta again!) I was surprised to hear that she had slugs as my visit to her garden last year revealed lots of beauty and I didn't see a single pest. She then revealed that she has every garden pest imaginable. I was shocked!

We live within a half hour of each other and yet I have never had a pest problem. I've really only seen garden pests in books. Now, I've seen her gardens and we are members of the same garden club. I certainly don't have any more garden knowledge than Apple so what's the difference between her garden and mine?

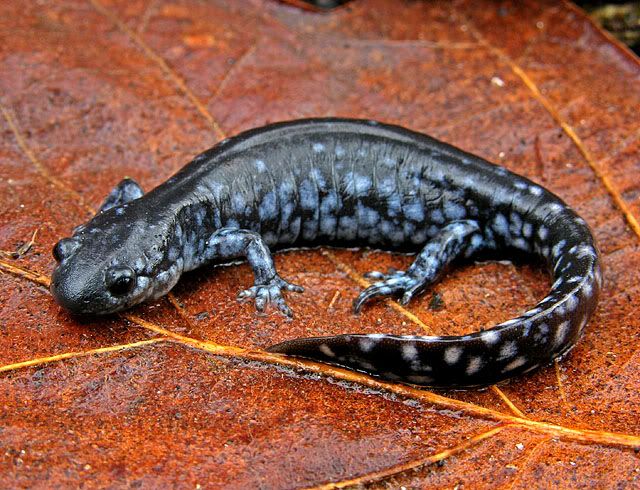
The only odd thing about my garden is an abundance of salamanders and newts. I've noticed quite a few of the amphibians living in or near my gardens. I've often surprise them when I'm "fixing" the rocks that border my raised beds. But everything I've learned about Salamanders & Newts say they need to live near water. Why are they in my garden then? I have no water features. No swampy area. No bogs. No standing water of any kind. (Although I'm working on that water feature thing~heehee.) So why are they here? And are they my secret weapon to a pest free garden?

After some research (thanks much to NY Falls) last night I have found that salamanders do like to eat slow moving prey like slugs and snails. Never having seen either in my garden though I have to wonder what comes first the slug or the salamander?

Monday, March 10, 2008

Bright Ideas for Spring: Annuals!


While we are all in different stages of Spring (some of us have feet of snow and some of us have lovely daffodils) there are still Spring chores that can and should be done NOW. I hear you "Snow" people groaning...Yes, even you have chores to do.


  • Sow hardy annuals in place or in peat pellets/trays indoors. If your lucky enough to have a green garden already... look between your perrenials as a chance to sow some "annual color". If you're unlucky enough to still have snow buy a new annual. Choose an annual that you have never tried before. Feeling outrageous? Choose a color that you have always wanted to try. Build a color scheme for your containers that has never been done before (at least not in your garden).

  • Begin to transfer your large seedlings to they're permanent home. Just remember to watch the forecast closely if your planning to put these seedlings outdoors. One frosty morning can do a lot of damage to these wee little ones. Northern Gardeners: Are your garden containers sitting in the garage or basement waiting impatiently (like you) for spring? Transfer seeds now and move them outdoors when the weather finally co-operates. In the meantime, place the containers around your home indoors. I've found that if I place containers near a lamp with a compact fluorescent bulb (the ones we're all using for energy efficiency anyways) the plants don't need as much "window" time. Just keep your lamp very close to your container and most importantly: Keep it turned ON!

  • Be prepared for frost! You may be past your frost free date or you maybe crossing your fingers and hoping. The best plan includes being prepared. Have garden blankets on hand to cover seedlings when a frost is in the forecast. While the neighbors may think you're crazy now you'll see the benefits later! Northern Gardeners: Remember that indoors your containers need more water because they can lose moisture to your "dry" house. So give your containers and seedlings plenty to drink.

  • Plant a Gift. Okay, so you're garden is done. It's perfect and you don't want to add or try anything but it's winter and you NEED to do some gardening. Why not start a few small containers to give away as gifts at upcoming bridal showers, baby showers, or birthdays. Never know what to give the boss? Aha! Now, you have a gift idea that is both inexpensive, memoriable, and meaningful.

Saturday, March 8, 2008

YeeHaw! Let's do the Veggie Two-Step!

Whether your a long time gardener or a first time newbie it's important to know your garden's likes and dislikes. Spring can be an excellent time to re-work your garden plans. A good rotation plan can be a seasonal dance in which crops move around the garden in what I like to call a Veggie Two-Step. But there can be both drawbacks and benefits to rotating your crops.

By rotating your crops annually or even semi-annually you can reduce the number of pathogens and pests that can occur when one species is continually cropped. Crop rotation can also improve a soil's fertility by alternating shallow and deep rooted crops. It can also help with soil erosion and who doesn't want to save their soil?

However, did you know that the crop that was there previously can effect the success of the next crop? It can be very confusing. So where does a newbie veggie gardener like me start? With the very basics, of course. Here is my basic Veggie Two-Step Rotation Chart. I hope you find it useful too.

Tuesday, March 4, 2008

IT'S ALIVE!!! IT'S ALIVE!!!

Okay, so maybe I am being a bit dramatic but this the first time I've seen any sign of "garden" in well over 3 months! And it's ALIVE! Could this day get any better? But wait there's more? I don't believe it... Yes it's true signs of life in the greenhouse too!

PS~ My mom is mad at me because she lives in the woods and her gardens look like this:

HeeeHeee! Oh, I mean, jeez that's too bad, Mom! LOL!

I think I've been disinherited!

Monday, March 3, 2008

The Best Gardening Advice EVER!

When I was new at gardening I went to a meeting of my garden club distraught because all of these really lovely ladies had extremely lovely gardens...and I had just killed yet another unlucky plant! "What did I do wrong?" I cried. I received lots of gardening advice (which I avidly listened to and then promptly forgot). As the meeting neared it's end a short, cute, elderly woman grabbed hold of my arm. Margaret then proceded to give me the best gardening advice EVER! She said,
"You're a Mom and a Gardener
and you want to be successful at both.
But sometimes you are going to fail.
Which one would you prefer to fail at?"
It was like a weight had been lifted off of me! So what if I couldn't raise flowers and children at the same time. My children were my number one priority and the pretty flowers were just decoration for my children's world. As soon as I let go of the "need to succeed" I became pretty successful. Oh, I still have my weak spots...seeds and the unknown veggie garden but I became much more able to absorb the gardening do's and don'ts. Why is that~I wondered? I think it's because I realized that I didn't need to make a magazine-beautiful garden to be a "true" gardener. Instead, I just had to plant a garden that made me and my loved ones happy. And as we turn our attention to our "First Ever Veggie Garden Spectacular" (okay giving it a fancy name makes the kids get excited about veggies...and the hubby too!) we need a clear cut guide of when and what to do. Leave it to Storey's for yet another pearl of gardening wisdom.
Hardy
Plant as soon as ground
can be prepared
asparagus
beets
broccoli
cabbage
carrots
chard
kale
lettuce
onions
parsnips
peas
raishes
spinach
turnips
Semi-Hardy
Plant 1 to 2 weeks before
average date of last frost
cauliflower
potatoes
Tender
Plant on or just after
average date of last frost
New Zealand spinach
snap beans
sweet corn
tomatoes
Very Tender
Plant 2 weeks after
average date of last frost
cucumber
eggplant
lima beans
muskmelon
peppers
pumpkins
squash
watermelon


I'm certainly not growing all of these crops on my first attempt but at least I've got a good "guideline" as to what I should be doing...and when I should do it!
Now if it would only stop snowing...

Friday, February 29, 2008

A "Seedy" Stress Reliever

Since those frightening moments of Monday morning I've found that my mind has been in high gear as I try to figure out how this happened and what I need to do to make it better. I have to "watch" for suspicious symptoms all day and at night too. Which means my daughter has her own "camp" cot set up in our bedroom. Needless to say, I'm not sleeping well and neither is she. Stress has hit "Garden Girl" and Mom quite hard.

But I know I'm not the only one who deals with stress on a daily basis. Some very healthy people head straight for the gym to work(out) their stress away. Some very intellectual people head straight for a book to read their stress away. Some very talkative people keep dialing phone numbers until they've talked their stress away. But Gardeners are not normal people. What others feel are more household chores gardeners relish as the best type of stress reliever. Why?

  1. Sunlight. The news is constantly reporting both the benefits and the dangers of being in the sun. However, nothing feels better than feeling the sun warm your skin as you tidy a garden bed filled with the fragrant blooms.

  2. Sense of Accomplishment. One of the best stress relievers is feeling as though you've accomplished something. Creating a beautiful garden bed where once there was nothing is an excellent way to do just that.

  3. Connect with Nature. As we live our normal lives with cell phones, computers, automatic doors that don't seem to open for us we all encounter stress. Nature provides us the opportunity to disconnect from the world and tune into a quieter part of ourselves and our environment.

  4. Exercise. Only someone who has never weeded flower beds for hours on end believes that gardening is easy. Lifting, bending, stretching, digging, planting, raking. All of these vigorous activities get the blood pumping and can give the same benefits to a stressed out gardener as going to an "actual" gym. And the garden smells a lot better!

So, my dear "Garden Girl" daughter and I are planning to de-stress ourselves by planting our seeds together first thing Saturday morning. Last Sunday I received a call from my local Ace Hardware store. This was unusual but a happy surprise. The manager called to say that they were holding a one day only sale and were randomly contacting some of their Ace Rewards Members. We had nothing urgent planned for our Sunday so we gathered the tribe and went into town. Upon entering I realized that the store was prepping for spring! And there among their goodies were seeds...marked for the one day only sale...10 for $1.00! So instead of hemming and hawing over which I could afford I let my two girls pick out the pretty ones. Apparently we're going to have a lot of pink and purple flowers in our whiskey barrels this year. They chose:

They had so much fun...and I got a real bargain on my annuals. What could be better? Thanks Ace, and our wonderful manager who decided upon entering the store to have the one day sale!

Saturday, February 23, 2008

A Seedy Gift & Successful Seed Starting Tips

Don't you love it when hubby shows up with a gift? Especially one that proves how well he knows you? Hubby did just that when he brought home a greenhouse last night. Since Robin posted about Winter Sowing late in January I've been frantically looking for a shelf system to meet my needs. It's been a difficult search as most of February our garden centers were still in the midst of "seasonal" stocking. At last, they've brought out the real goodies... the garden gear! Yippee!

I think hubby was fearful that I was going to try and "repurpose" his workshop shelves...I had threatened to steal his workshop lights. So tada! Greenhouse gift! And just in the nick of time too... It's finally time to start my peppers! As I've admitted I have had difficulty with seeds before. Matter of fact, my three year old was "helping" to assemble the greenhouse last night and asked, "What's this for?" Daddy answered, "For Mommy's seeds." To which she said, "Mommy's seeds don't grow!"

Seed starting can be overwhelming. And the information available tends to focus on how to start the seeds which is a pretty straight~forward task. To help improve my seedy chances this year I've ignored all that info and bought the peat pellets. I've heard good things about the pellets and am ready to give them a try. Through my research I've found these really simple starter's guide to:

Seed Survival~The Basics
Provide your seeds with the following for happy seedlings.
  • Light! You have two options natural or fluorescent. For natural light place your seedlings near a sunny, southern window. Rotate your seedlings often so they don't bend over as they search for the sun. For fluorescent the key is to use a cool white bulb and to hang the fixture directly over the seeds.
  • Warmth! Most seeds like a warm environment. Seeds will germinate and grow best in a 70-75 degrees Fahrenheit (21-24 degrees Celsius). After they've become little seedlings though they tend to enjoy temps between 60-70f (15-21c).
  • Mositure & Humidity! Keep the germinating medium moist but never soggy. To keep moisture levels high slide your seed flats into clear plastic bags. Or cover your shelving system with clear plastic. Remove the cover as soon as seeds sprout. Check medium everyday for drying out. (TIP: Dryer medium will be lighter in color.)
  • Water! As your seedlings grow they have to establish they're "feet" in the soil. Just like babies they can fall over easily. So as your tempted to grab your watering can...STOP! When you add water to the top of your planting medium your seeds/seedlings have no way of anchoring themselves into the soil and so they will "float" on the water and fall over! :( So ALWAYS water from the bottom until seedlings are quite large.
  • Fertilize! I've made the mistake before of fertilizing too early so when is the best time to add those extra vitamins? After the first True leaves appear. The first leaves are food storage cells...it's those second leaves that really spell success! This is a good time to begin fertilizing with liquid soluable plant food as you bottom water your seedlings. When seedlings are very small use 1/4 of the amount of plant food directed on package. Increase to 1/2 the normal stregnth as seedlings begin to mature.

With simple steps like these I hope even seed challenged people (like myself) will find it easier to get healthy plants from those amazing little seeds.

Friday, February 22, 2008

The Benefits of Cooking Your Soil...Yes, Cook It!


As many of you know I'm addicted to raised garden beds. Although, now that I know the difference I'm determined to call my beds by their proper name: framed beds. (Thank You, P. Allen Smith) Because I love framed garden beds so much I tend to have a lot of soil trucked in. I'd love to say that I buy only the finest in garden soil, rich in nutrients and completely bug free... BUT it just isn't so. I am the ultimate garden scavenger. I've gotten topsoil from construction sites, the town DPW at ditching time, anywhere that has free soil. Which means I spend a lot of time removing unwanted "stuff" from my garden soil. Although, it is time consuming to remove bottle caps, stones, etc. it's always the other stuff in the soil that worries me.
I don't know where this soil has been, and I don't know what's living in it. EEWWW! Which means that pest removal is my biggest priority. If I told you that there is a easy and fool~proof way of eliminating practically every harmful insect egg/larva in your garden would you do it? What if I told you that by doing this you also provide other garden benefits? What if I told you that it is LOW to NO cost?
I bet that you're pretty interested! The process itself is called Soil Solarization. It's a fancy term meaning to use the sun to cook your soil to a temperature of 140 degrees at the top of the soil to over 100 degrees as far as 18" deep!
  1. Prepare the soil: You know the drill. Clear debris/weeds, Add amendments, Rake to remove any trapped "air pockets".

  2. Water thoroughly. This creates 100% humidity. Without the humidity it's like trying to steam your veggies without any water...it just doesn't work.

  3. If your working with a ground level bed then dig a trench about 6-8 inches deep around your garden. If your working with a raised/framed bed usually you have about that much soil above ground so you can skip this part.

  4. Cover with clear plastic (6 to 8 mm) overlapping the trench/framed sides. Fill in the trench with soil weighing down the plastic while pulling it as tight as possible. In a raised/ framed bed you can also use soil/rock to weigh down the plastic or you can staple it to your frames. Remember the key to success is a air tight covering.

  5. Patience....Patience! 4-6 weeks of sunshine and you have healthy soil. No matter where it came from.

This process is cheap and easy. Although if you have a patience problem like I do...Good luck. Soil Solarization has many benefits. According to one of my long time favorite books: Storey's Basic Country Skills "It kills insects, nematodes, harmful fungi, weeds seeds, and eliminates plant diseases. At the same time helpful microorganisims within the soil apparently benefit, possibly from lack of competition. Soil that has been solarized allows plants to draw on nutrients, especially nitrogen, calcium, and magnesium more readily. Seeds germinate more quickly. Plants grow faster and stronger, often maturing earlier with substantially higher yeilds, than in unsolarized soil." All I know is that I can't ever remember having any of my gardens infested with anything. I generally never have to worry about bugs or disease. So does it work? I'll let you try it and judge it for yourself.

I love this book. Like I said it's one of my all time favorites. But if you don't own an old beat up copy like I do...Try The Green Man (warning it's a PDF) for some good soil solarization info.

Wednesday, February 20, 2008

Re-Worked Kitchen Schematic

After closer inspection on the BHG Eye-Catching Garden from yesterday's post I think it could use a little re-working to fit the needs of my family. Meaning I spent hours and hours last night trying to cook/eat/cleanup dinner while refusing to put down my schematics.

Schematics sounds like a technical term but I've been drawing schematics since I was old enough to write my name. From that time until now my Dad has operated heavy equipment for a living. So when a long holiday would roll around it would only make sense that he would want to enjoy himself. And he did...immensely. Because whenever he could talk his bosses into it he would borrow a piece of equipment to bring home. Our long weekends were full of landscaping adventures and they all began at the kitchen table with paper and pencil. The drawing of a detailed work plan became a family tradition. And like all good family traditions it got a nickname. Schematic. To this day I begin every project with a schematic only now I start at the kitchen table and end at the computer.


Back to the Kitchen Garden Schematic: First, remove all tomatoes. Wait! I know that a lot of gardener's love them some tomatoes and I certainly give kudos to all those tomato lovers. However, hubby and I aren't fans. After all of my minor changes to the garden plan I ended up with the finished layout plan above. But maybe, you are a fan of tomatoes and peas and all the other things that I took out. If so, you can get your own copy of the original garden plan (minus the color coding I've added) by visiting Better Homes & Gardens by clicking on the BKG link above or by clicking the original layout below.

Tuesday, February 19, 2008

Veggie or Kitchen Garden? There's a Difference!?!


I'm apparently the only person in the world who doesn't know that vegetable gardening comes in many forms. As I've delved deeper into the vegetable gardening world I have readily admitted that I'm an idiot. I know nothing. Absolutely nothing. And so as always I grabbed my trusty mouse and began my research. In a past life I might have been a researcher for the NY Times or something more devious like the IRS. Today however, I believe that I have turned my researching knack into an artform. For today, I have turned an idiot into a novice in the ways of vegetables.

As I began my research journey I started with Wikipedia's Vegetable Garden and then proceeded to Wikipedia's Kitchen Garden. I was struck with a new thought. "There's a difference?" Why had nobody told me?!? After hours of research I've determined that ultimately the difference is this: Veggie gardens grow veggies and some fruits like tomatoes. Kitchen gardens grow veggies, fruits, herbs, and flowers edible and decorative. Now that I know the difference I believe that I've been wanting a kitchen garden. Go figure!

However this discovery provided yet another "I never knew that" moment. (I know that's common with me.) It was as I moved from Wikipedia to more traditional garden sites that I read a wonderful 2 part article by P. Allen Smith aptly named Starting a Kitchen Garden. From this article I learned that there is a difference between raised garden beds and framed garden beds. Again, Why had nobody told me!?! The main difference: A raised garden bed does not need to have sides. It can be just mounded soil. Meanwhile, a framed garden bed needs (obviously) a frame around the soil such as wood, rock, bricks, etc. However, a framed garden bed must be bottomless. That sounds kinda dirty...P. Allen Smith explains it so much better.

With that useful information tucked inside my brain (probably never to be heard from again) I made my way to BHG's Eye-Catching Kitchen Garden. Aha! I'm already a member of this site so I am eligible to download the PDF file that gives me a detailed layout diagram, a list of plants for the garden as shown, and complete instructions for installing the garden. Finally (tears of joy streaming down my face) I've found Gardening for Dummies! I've been just praying for someone to tell me where, how and what to plant. It's a Halleluiah Moment! But it looks too good to be true. Can I really do this? Is it really possible?

If only there was a gardener out there who showed a real picture. Or better yet a slideshow! A real gardener showing that yes kitchen gardens are possible, are pretty, and can be a dream come true. Wait! I've found that Gardener. Terry L. Yockey of Northern Gardening (a site I'm sure most of you are fond of) has been gracious enough to provide a visual step by step through the construction of a beautiful and real kitchen garden. This slideshow (viewable only in Internet Explorer) gave me a feeling of "I CAN DO IT!"

When I joined my garden club 10 years ago I begged the ladies to help me to stop killing my plants. It's taken me 10 years to finally feel comfortable claiming to be a "gardener". I love my ever changing flower beds. And as a friend recently pointed out to me...I've become obsessed. So I've set myself a new goal. In 10 years, I hope to be just as comfortable with being a "kitchen gardener" as I am with perrenial flowers. Give me a few decades and I might even try hydroponics!